VERTEX COLOUR
What is it?
Why should I care?
How do?
Vertex colour is a RGBA value that can be applied to any vertex on a mesh. Traditionally, this is used to add diffuse or emissive colour to geometry, but with the advent of more powerful game engines and more complex shaders, vertex colour can be used to do amazing things!
Pros:
-So cheap! Like an RGBA texture map for free!
-No UVs needed
-Can be baked to (say whaaaaat)
-Multiple uses
Cons:
-Geometry dependent
-Not suited to preserving high detail
I most commonly use Vertex colour for foliage animation, baking inexpensive AO and lighting information, blending different materials on terrain (or any mesh) and cheap subsurface scattering but you can use it for much more!
Here are some examples using Maya and UE4, but this can also be applied to Unity working with Shaderforge.
Looking at the Colour menu in Maya, we will mainly be working with Batch Bake (Mental Ray), Color Set Editor
and the Paint Vertex Color Tool.


Batch Bake (Mental Ray) can be used to bake AO and Lighting information to the vertices.
Make sure you set bake to vertices and check use bake set override. Color mode allows you to set what information to record, mostly used for occlusion and you can adjust the rays for higher quality. The rays shouldn't matter too much unless your mesh is quite high poly.
Change the color set name to make it easier with mutiple colour sets.
The clamp options allow you alter what gets baked and control individual colour channels, something I'll make use of further down.
Hit convert and close to check out your AO bake. If it didnt work as expected try deleting history on your mesh, sometimes that can cause issues.
By tweaking the vertex colour filtering you can soften the bake which can get rid of artefacts. Again, this is more important for high poly meshes.


On the right in the first image is this small scene with baked AO, and underneath is the same scene with a subdivided mesh. You can see the more vertices a mesh has the more definition it can preserve in the bake. Tweaking the occlusion falloff will allow you to adjust the amount of AO. This information can be easily transferred in UE4 by using a vertex colour node and plugging it into the Ambient Occlusion output, or more universally multiply the vertex colour over the diffuse colour or diffuse texture map.
Below is a curtain mesh exported from Marvellous Designer, and you can see because of the higher density of this mesh the AO bake works really well, and you could fully shade this proceedurally without the need for texture maps.
Sometimes the bake may not perform as expected, most of the time this can be fixed by deleting history on the mesh before baking.
This technique is a great way to add another layer of detail to your models inexpensively, but baking a greyscale image over the RGB channels is quite wasteful considering you could pack that information in to just 1 channel. I will now show you how to bake to just 1 channel, and make use of the other channels to animate a plant mesh.
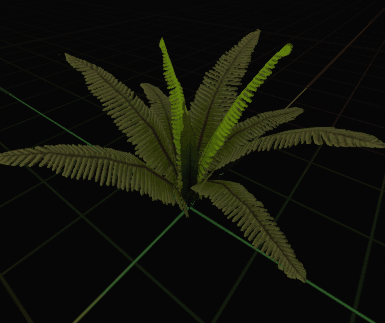
I am going to use 2 different channels to animate the mesh. The R channel will control the ambient jitter of the leaves while the B channel will control the plant being affected by the wind, with AO baked to the G channel. I tend to use these channels for these specific uses and I think it's important to develop a system and stick to it. It makes it much easier and quicker to work with vertex colours, greypacks etc if each colour represents a specific purpose.
Open the Color Set Editor and with the mesh selected delete any colour sets then make a new one and label it R. Then using the Paint Vertex Color Tool, set it to replace and the color value to solid red. I then go around the edges and paint in using b + left mouse drag to control the brush size. You want red anywhere on the mesh that is weaker and more responsive to movement, for example i painted red further down on the middle younger shoots of the plant as I know that they are softer and move more in the real world.
Export the FBX from Maya and then import into UE4. In the FBX Import Options make sure the Vertex Color Import Options is set to Replace. This will make sure that the vertex colours are imported with the mesh. This is especially important when you are working back and forth between Maya and UE4 and updating the FBX.
You can check your vertex colours have imported properly by opening the Static Mesh Editor and clicking the Vert Colors button. They should display on your mesh the same as in Maya.
Now that the R channel is done on our plant, we will now move on to the B channel.
Create a new colour set and label it B. create a new poly plane and resize it to roughly the same size, then using the Paint Vertex Color Tool paint solid blue across the top. We are now going to use the Mesh>Transfer Attributes tool to project the colour from the plane to the plant mesh. select the plane, then the object you're projecting to and then Transfer Attributes using the settings to the right. The great thing about this tool is that you can now move and edit the plane and this will transfer to the other mesh so you can get it exactly the way you want, and then once you delete history it breaks the link and you can then delete the plane. This is one of the most useful tools when working with vertex colours as it allows you to colour highpoly meshes which would be difficult to work with otherwise. you can also transfer colour from anything with vertex colour, not just planes.
Now that the B channel is done we are going to bake AO again, but only to the green channel. We will be using the same bake settings in Batch Bake (Mental Ray) as before, although tick Clamp Max and change the Max Color to solid green. Also you can change the Color Set Name to G if you like to complete our RGB yay!
Now we need to combine our 3 channels into 1 colour set. Open the Color Set Editor and selecting 2 at a time change the blending mode to Add and then Merge. These blending modes work exactly like photoshop blending modes or the math nodes in any Material Editor, so if you don't know them yet get familiar!
Once that's done you should have a pretty funky looking rainbow thingy, this is not a mistake! We have just placed those colour sets ontop of each other and the greyscale information is unchanged in the individual channels. The reason we do this is because the FBX format only preserves 1 colour set and we want to make sure it has all the information we need for UE4 (or unity).
Now it's time to start animating! create a new material and in the Material Editor create a vertex color node. This is what we will use to access our vertex colours in the material. You can go ahead and plug the green channel (with our baked AO) into the ambient occlusion output.
Next I am going to create a simple 'wind' animation using a sine and a TimeWithSpeedVariable, as shown on the left below. Sine oscilates back and forth between -1 and 1 at the speed the time node specifies. Play around with this! Multiplying sine will increase oscillating distance, or adding values to the sine will influence the pivot point. Just by tweaking you can get a variety of different effects. Multiplying by the chain by the blue channel of the vertex colour before plugging in to world position offset, the movement will be masked by our blue vertex colour and only move as we want. Compare with and and without this to see the effect.
Now to break up this back and forth movement for more realism, we are going to use our red channel to add an ambient jitter. Using the SimpleGrassWind node and adding it to our current sine setup will give the results on the right below. Playing with the wind speed and the intensity can create a variety of looks, from severe wind to seaweed underwater!
The best way to learn different world position offsets is to play around with them and see what effects you can create. By using these simple techniques you can create flowing flags, animated rope, ringing bells and so much more that will give your static environments much more dynamism.
I will be using these basic techniques later on to create much more complex shading networks for foliage and layered terrain, so stay tuned!